Email Management System: Your Ultimate 7-Step Guide to Inbox Control
Ever felt overwhelmed by your inbox? Not sure where to start with organizing it all? Trust me, you’re not alone, and I’m here to help. In this guide, I’m going to walk you through a straightforward 7-step email management system that will put you back in control of your inbox.
Here’s what you can expect to learn from this article:
These steps can help reduce your time and energy dealing with daily emails.
Though I use Gmail and my examples are based on it, don’t worry if you use a different email provider like Outlook. Most of these strategies can be adapted to any platform.
So, let’s get started on taming that inbox!
What is Email Management System?
Email management is the art of keeping your inbox tidy, and organized, and ensuring emails don’t dictate your schedule. This doesn’t mean maintaining an empty inbox at any given time; instead, it involves handling your emails in a systematic, time-efficient manner that works for you and your schedule. To put it even simpler, a great email management system will answer three following questions:
1) WHEN you will process your emails?
2) HOW you will process them?
3)WHERE they should go after that?
The key here is not to be misled into believing you need to constantly check emails to be on top of things. ( I will cover it more in the mindset part ).
Why is Email Management important?
In this digital era, where communication is predominantly conducted online, email management is essential for personal productivity and stress management.
Having a proper email management system in place will allow you to have more time to focus on more important things in your life, have less stress about missing important emails and events, and generally feel like you are more in control of both your personal and professional life!
How to get started with Email Management System set up?
To kickstart your email management system setup journey, make sure you have the following:
Do you have all of the requirements ticked off? If yes, let’s dive in!
7 steps for success in email management
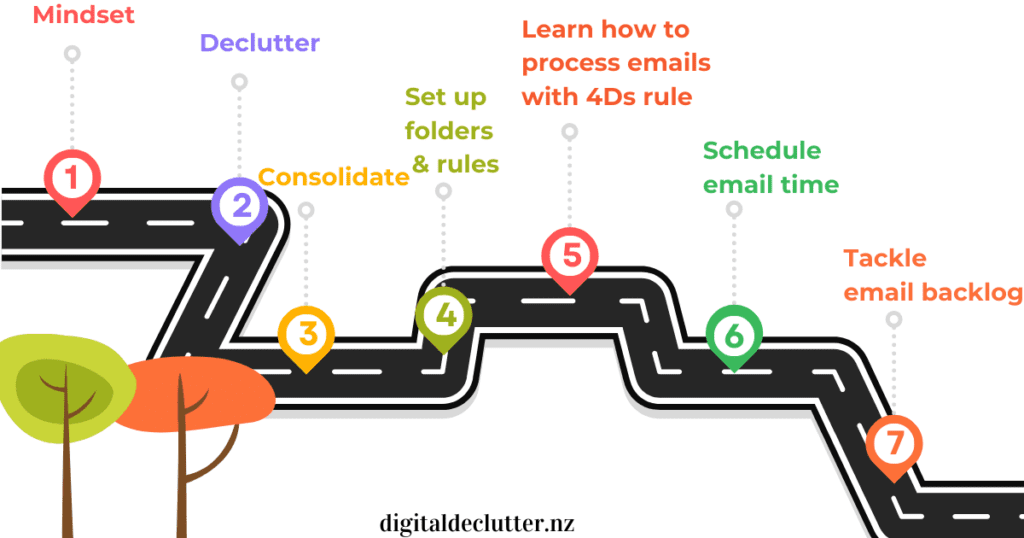
To win the war against email chaos, follow these 7 simple steps:
- Shift your mindset: Embrace the ’email-as-a-filer’ mindset and stop checking emails all the time.
- Declutter: Unsubscribe from irrelevant mailing lists and disable social media notifications.
- Consolidate email accounts: Instead of juggling multiple email accounts, set up forwarding or pick one main account to streamline your emails.
- Start with a Clean slate & Set up folders: Move all your existing emails into an “email backlog” folder, and then set up Gmail’s ‘Star’ inbox to process your new emails the right way moving forward. Keep your inbox organized with folders like ‘Action’, ‘Waiting for Response’, ‘Quick Reference’, ‘To Read Later’, ‘Archive’, and ‘Unsubscribe
- Learn how to process emails with the ‘4Ds’ rule: Delete, Do Now, Defer, Delegate. Each incoming email should be subject to these actions.
- Establish an email processing routine: Set specific periods in your day to process emails. Don’t let email checks seep into your entire workday.
- Tackle the backlog: Review and clear out older emails by setting aside regular time intervals to deal with your email backlog.
Let me elaborate on each step a bit more.
Step #1 Shift your mindset
Your inbox is just a filter
Before we dive into the practical steps, let’s first adjust our mindset. From now on, I want you to treat your email as a filter. It’s NOT a storage box, reminder system, or to-do list. We need to think about how we can move information from your email to more suitable places like a calendar event, a reminder, a file stored in the cloud, or even a task moved to your CRM system. Don’t worry, I’ll cover this more in the email processing part of this article.
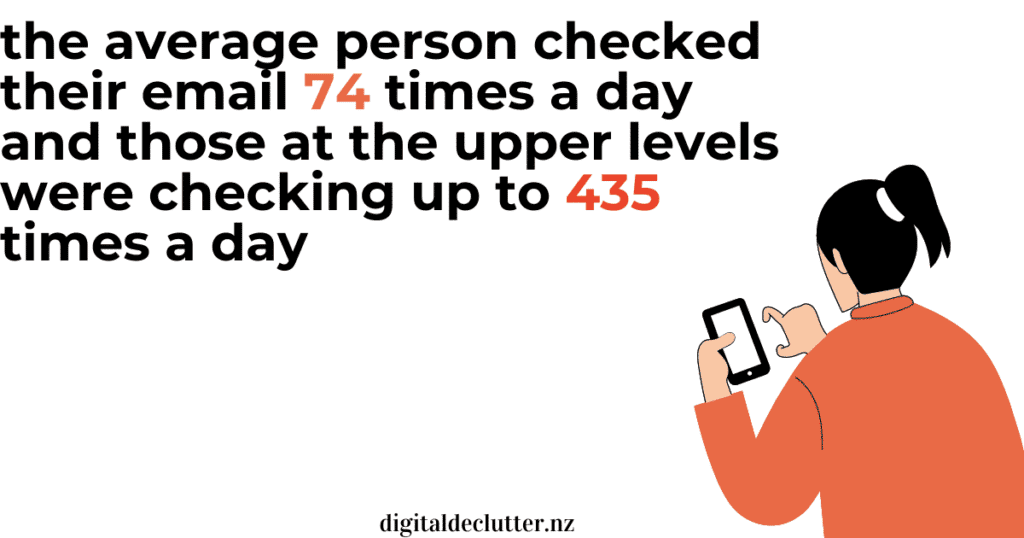
Research by digital distraction expert Gloria Mark revealed that people check their emails between 74 and a whopping 435 times a day. While it’s comforting to know we’re not alone in our email obsession, these numbers are troubling. Constantly checking email disrupts productivity and impacts well-being.
So let’s break this habit.
Your inbox is not your to-do list
Another thing many people are guilty of is seeing their inbox as their to-do list. This approach is harmful to your productivity and overall well-being. Every time you open your inbox, all those unfinished tasks are staring at you. Not to mention, the number of to-do items keeps adding up without your control over them. We need to separate emails and your planning activities.
You can manage when you respond to emails
Lastly, stop feeling guilty. Do you ever feel rude for not responding to an email straight away? Remember, email is not real-time communication. Unlike face-to-face conversations, the sender doesn’t know your schedule or if you’re busy. Don’t let guilt control you. You’re in charge of your inbox and when you realistically can respond, managing it effectively is key to maintaining a balanced life.
Step #2 Declutter your inbox
Ever wondered, ‘How do I organize my messy email?’ or ‘What are some effective ways to organize emails?’ Well, think of it like house organizing. It’s tough to tidy up when there’s just too much stuff around. One of the biggest challenges in keeping your inbox under control is the sheer volume of emails coming in every day.
Here are three things I suggest you do:
- Unsubscribe in Bulk: Use unsubscribe tools to reduce the inflow of unwanted emails. I personally recommend Leave me alone (I’m a big fan of their 7-day pass option), and clean email. While there are free apps like Unroll.me, I’d advise against using it. You see, this app doesn’t permanently unsubscribe you. If you close your account, those newsletters start flowing back in from that date onwards. Plus, there’s the fine print that no one’s talking about. It’s a free app because the owner, Nielsen Consumer LLC, is using your data and “measures e-commerce through a technology that automatically recognizes commercial emails and extracts purchase information from them”. For privacy-conscious individuals, this is not the best option. The tools I recommend never store your email’s content. Also, remember to use these tools for a one-time bulk unsubscribe and then implement the email processing strategy I’ll introduce later to maintain your clean inbox.
- Filter Incoming Emails: If a newsletter about the latest kitchen appliances sale isn’t helpful to you – unsubscribe! It takes the same amount of time to delete an email as it does to unsubscribe. But if you unsubscribe, you stop receiving irrelevant information. And don’t worry, if you need those kitchen appliances in the future, you can always sign up for their newsletter again! If you receive an important newsletter, filter it out to a separate folder “To Read” and go through it when you have time. You can even create a rule to direct such emails straight to the specific folder, bypassing your inbox entirely.
- Delete rule-breakers: Newsletters MUST have an unsubscribe option, but there will always be some naughty individuals. For these, create a rule to filter them out and delete them on the spot. You won’t need to do anything else!
- Unsubscribe from any unnecessary email updates. Do you really need to receive an email each time someone posts a comment on the FB post that you are following? Or do you really need to receive an email update about the promotion of someone from your Linkedin network?
READ MORE >>> Leave Me Alone App Review 2024: A Personal Experience of Taming the Inbox
All these suggestions can certainly help address the issue when your Gmail is full.
Step #3 Consolidate your email accounts
Managing a flood of emails can feel overwhelming, right? If you’re asking, ‘How do I handle too many emails?’, one of the possible causes could be having multiple email addresses. It’s like having multiple mailboxes and having to walk to each one to check the mail.
Do you have more than one email account? If yes, you might be spending unnecessary time logging in and checking each of these accounts throughout your day.
If you’re juggling separate work and personal email accounts, it’s essential to keep them both for organization and privacy purposes. But if you have multiple personal accounts, why not streamline them? Here are two options:
Option 1: Pick one Central Account – Create a primary account (the one you use the most), and shut down the others. This way, you only have one inbox to maintain.
Option 2: Forward Emails – Instead of checking multiple accounts, you could forward all emails to one primary inbox. This saves you from the hassle of logging into multiple accounts and keeps all your emails in one spot.
By implementing one of these strategies, you’ll keep your inbox more organized, save time, and reduce the stress of email management.
Speaking of streamlining, are you using the ‘Promotions’ tab in Gmail? It may seem helpful initially, but in the long run, it’s just creating another bucket to sift through when searching for emails. So, if you want to simplify further, you could turn it off in your Gmail settings.
At this point, you might wonder, ‘Won’t my primary inbox be flooded with promotional emails?’ Not necessarily. After having unsubscribed from most unwanted newsletters and setting up filter rules for the important ones, your inbox should be significantly cleaner and more manageable. Turning off the ‘Promotions’ tab then ensures that all your emails are in one place, without the need to check multiple tabs. This way, managing your emails becomes a more streamlined process.
Step #4 Start with a clean slate and create a folder system that works for you!
Now that you’ve cut down the number of incoming emails and consolidated them all into one main place, it’s time to tidy up and organize your email provider! This involves three steps.
Firstly, I want you to start from a clean slate! So move all your existing emails into a folder; you can call it “Inbox backlog” or anything you like. A certain magic happens when you see your inbox clean and empty – it motivates you to keep it uncluttered and process new emails faster.
Next, I suggest setting up a ‘Starred’ or ‘Action’ inbox. Here’s how it works in Gmail: Your primary inbox receives new emails. If an email requires action and it will take longer than 2 minutes, you “star” it and archive it. This moves the email to your Starred inbox. The email stays there until you’ve done what’s needed. Then, you unstar it, and it will automatically stay in the archived state. It’s simple and efficient, making email management much faster.
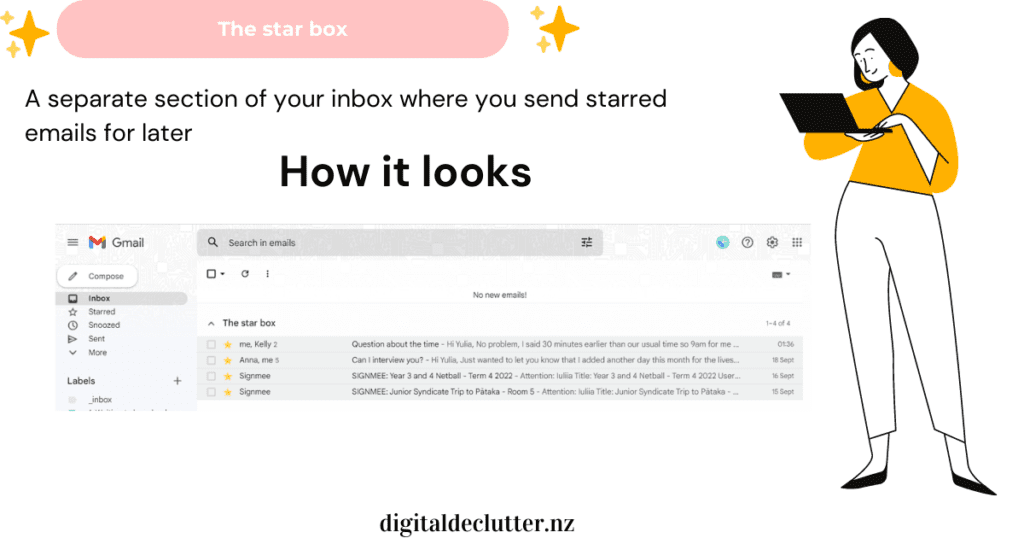
This method works both on desktop browser and mobile app. You can easily star emails, and then swipe left to archive them from your Gmail App.
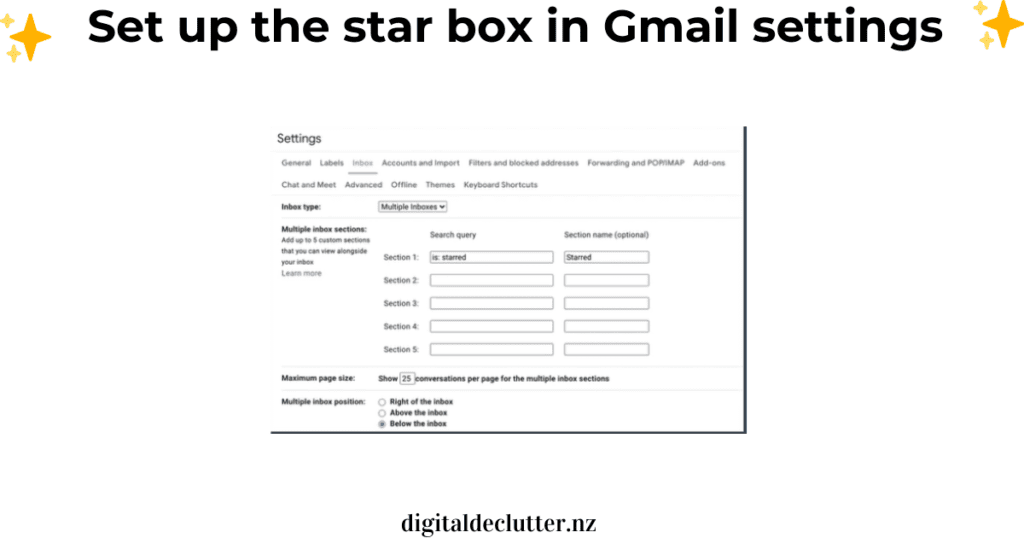
If you’re not a Gmail user, you can create an ‘Action’ folder and manually move emails there, or set up Quick steps to save extra time.
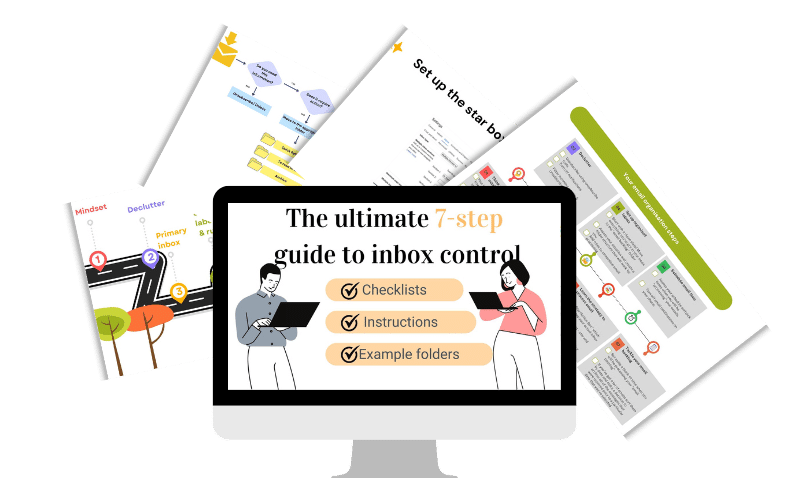
I’ve prepared a handy PDF handbook to show the how-to for setting it up both in Gmail and Outlook.
At this point, you might be wondering, “How do I organize emails into folders?” or “How do I organize my emails in Gmail?”.
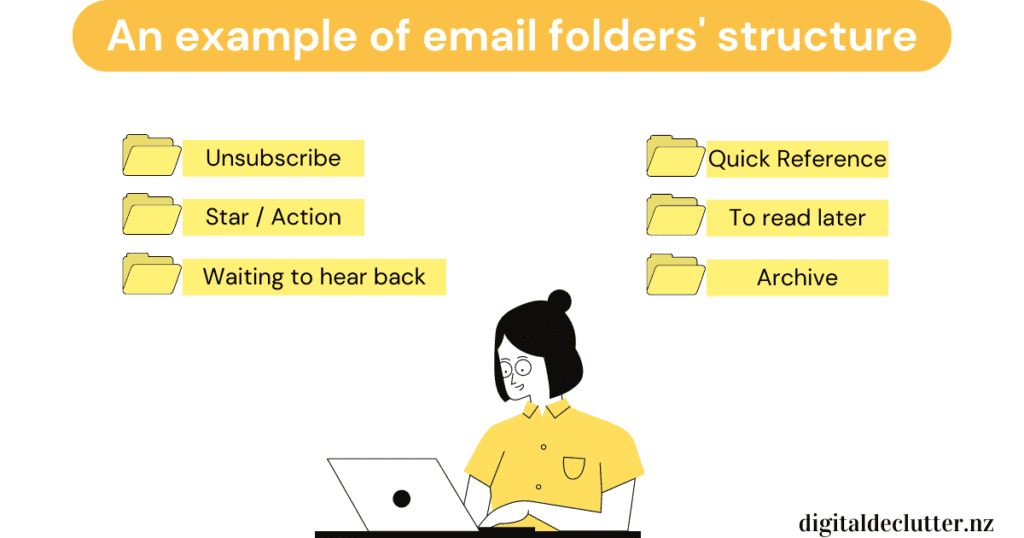
Let’s talk about specific folders you should have for smooth email organization. Here’s my suggested list:
The ‘Starred/Action’ folder is for emails that require an action that will take longer than 2 minutes.
‘Waiting for Response’ is for emails you’ve replied to and are waiting for a response. If a conversation involves too many back-and-forths, consider using other communication methods.
‘Quick Reference’ is for things happening now, like tracking a delivery or keeping flight details for an upcoming trip. Once you don’t need these emails, archive them.
‘To Read Later’ is for newsletters or information you wish to read later (remember to set up a filter for these).
You can also have an ‘Archive’ for information you might need in the future. However, I encourage you to think about storing this information outside your email. ‘Unsubscribe’ is for emails you want to unsubscribe from but haven’t yet. This is optional – I always recommend unsubscribing immediately.
You may need additional folders, depending on your lifestyle and work. For example, bloggers who don’t have a separate email account for their blog might need folders for comments, sponsor requests, or affiliate notifications. If you work with clients, a ‘Client Communication’ folder could be useful. We’ll discuss how to use all these folders effectively in the next section of this article.
But remember, the simpler your folder structure is, the better!
The best systems are simple systems.
As I mentioned before, your email shouldn’t look like a super detailed library catalog. If you worry that you can’t find an archived email, don’t! Modern email providers have advanced search mechanisms. So, you can always search for something and find it without necessarily filing every email you receive.”
Step #5 Learn a simple email Management system
Now that you’ve decluttered, set up your ‘Star/Action’ inbox, and created those organized folders within your inbox, it’s time to look at how you’ll manage it moving forward.
It’s similar to organizing a house. It’s not only important to buy fancy containers and labels, but also to set up a system and rules for actually putting things in their place. I promise, if you follow these simple rules, you’ll be surprised by how easy it is to stay on top of your inbox.
Before we dive in, I want to clarify a bit more about Archiving versus Deleting emails as I’ll be using the term ‘archiving’ quite often!
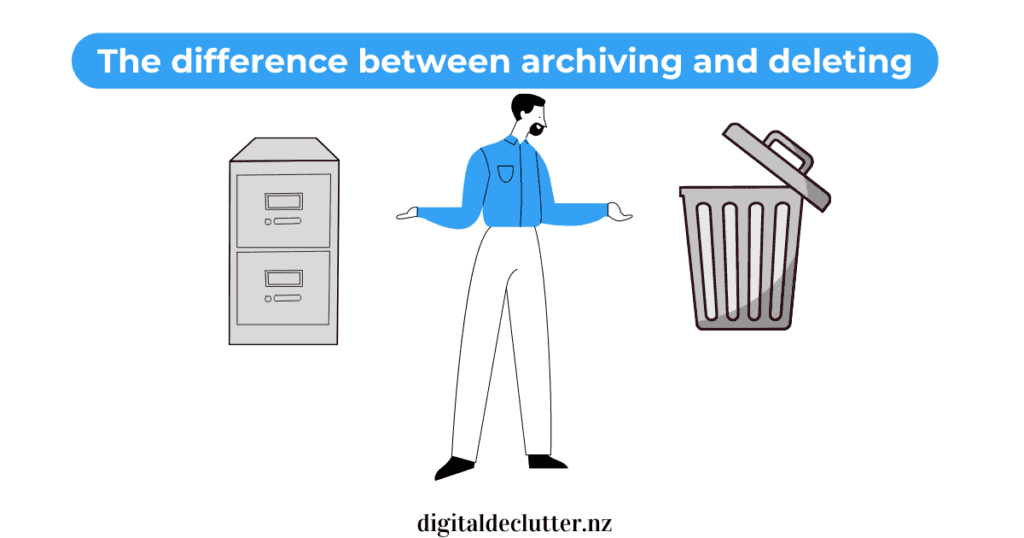
If you delete an email within Gmail, it goes to the trash and is permanently deleted after 30 days. However, if you archive an email, it goes to your history and will be always available for you from the All Mail section in Gmail. It works a similar way in Outlook, but it will stay in the Archive folder. From there, you can always find it. The only time I recommend deleting an email is when you have a lot of large files to save space (store them elsewhere, then delete them).
Archiving is like moving messages into a filing cabinet for safekeeping, rather than putting them in the trash can.
Now let’s talk about the 4Ds rule, a concept you may have heard from many productivity experts.
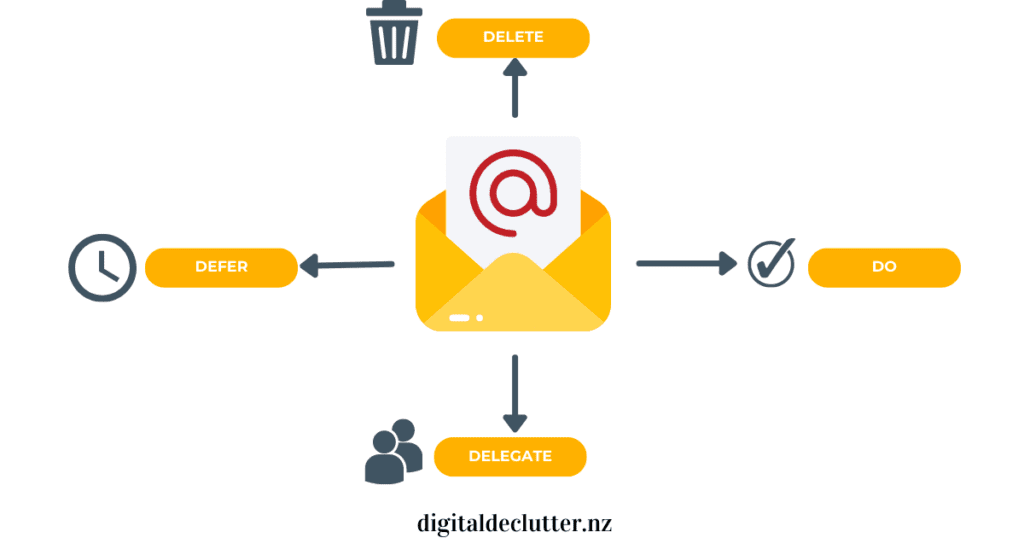
- Delete what you don’t need (unsubscribe, mark as Junk if it’s spam)
- Do Now – From now on, if you read an email requiring an action that will take less than 2 minutes to complete, DO IT IMMEDIATELY. It will get it off your mind and out of your inbox. Most emails can be answered in 5 sentences or less, so there’s no real reason not to tackle them on the spot. Gmail even comes with prewritten response options, which make your life even easier!
- Defer – if an email is too demanding (time-wise and skill-wise) to handle immediately, and you are the only person who can deal with it, then the only option is to plan to deal with this email later. However, don’t leave it in your inbox, move it to your star inbox and create an additional reminder or even a calendar event to deal with it.
- Delegate – this probably doesn’t need too much explanation. If this is something that other people can handle, why not use this opportunity?
Now let’s visualize all of this with a flow chart of email management:
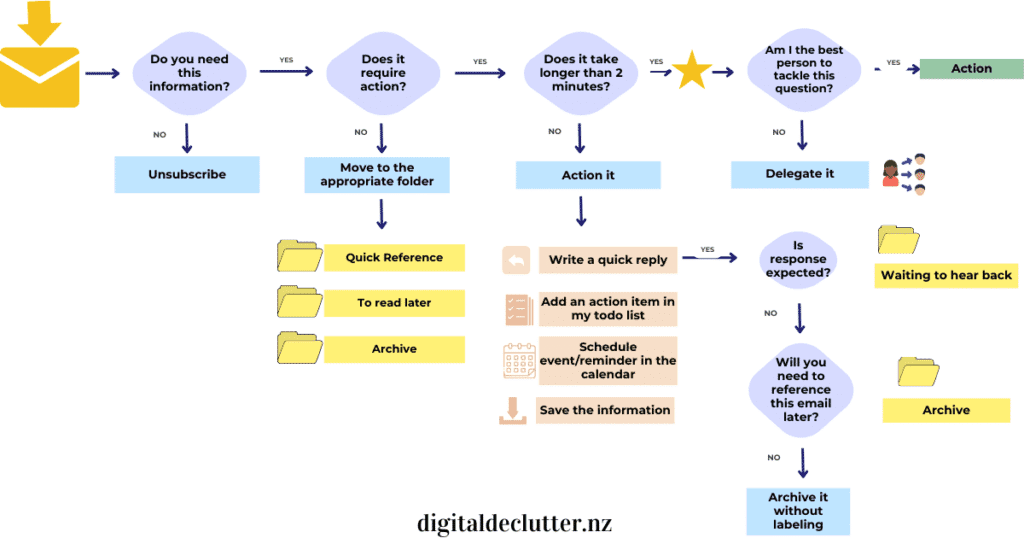
When an email enters your inbox, ask yourself the following questions:
Step #6 Craft Your Own Email Processing Routine
Don’t worry about keeping your inbox at the constant inbox-zero state. Instead, focus on establishing a daily/weekly routine for tackling your emails. And you will be surprised how easy it will be to take your inbox under control!
To truly boost productivity, set a specific time for focusing solely on processing your emails. From this point forwards, you need to set up a ritual for processing your email during the day, rather than just continuously checking it.
I know it’s tempting to sneak a peek at your emails on your phone or computer throughout the day—I’ve been there. But trust me, turning off email notifications is a game-changer! It might be hard to stay far from your emails for so long, that’s why I suggest incrementing slowly the time blocks you are not checking emails.
Here’s an example: You could set up 15-minute email processing blocks throughout your day—say, in the morning, at lunch, and at the end of the day. Alternatively, you could establish two longer periods in the morning and at the end of your workday. The choice depends on your personal preferences, your daily influx of emails, and the nature of your work. Be flexible, and allow some room for adjustments. See what works, what doesn’t , and with time you will find the system that will fit you perfectly!
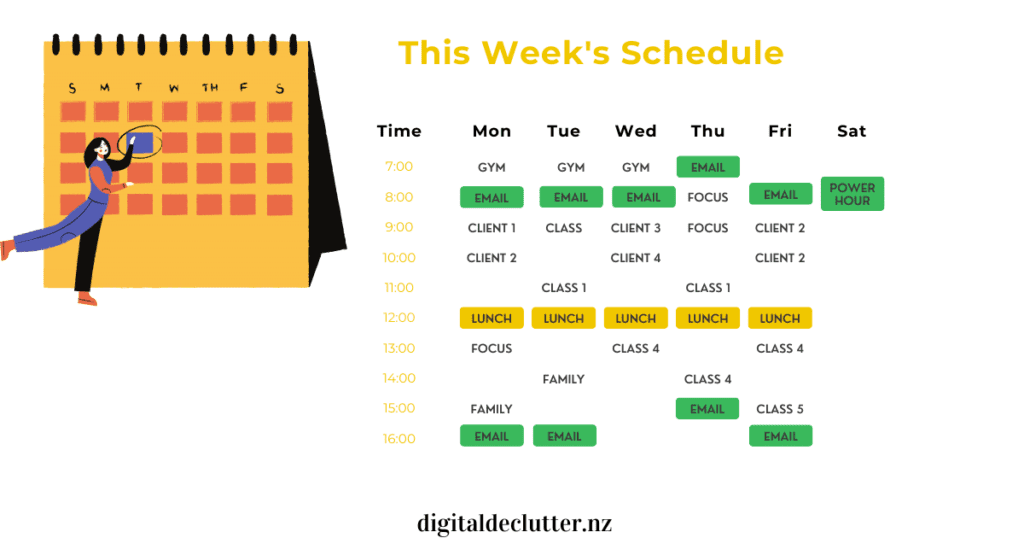
The rule of thumb I’ve been sharing with my clients is to not even open email if you realistically can’t process it.
I also recommend setting aside a ‘Power Hour’ each week, during which you tackle all the emails in your ‘Star/Action’ inbox that you couldn’t deal with during the week.
Step #7 Take down the email backlog
Have you tried the “clean slate” exercise? Are you staring at an email backlog folder right now? Is it bursting at the seams, don’t sweat it—I’ve got a solution! Now that you’ve got your shiny new folders and a solid grasp on email processing, it’s time to create a plan of attack!
If you’ve got a stash of unopened emails, say more than 3000? Or even 10000? there’s probably a REASON for that. They might not be important, interesting, or urgent enough to demand your immediate attention. Or they WERE important and urgent, but you’ve missed that and now it’s kind of too late to actually answer them. That’s fine! We all make mistakes. Just pat yourself on the shoulder. Now, with your new email management system you’ll never feel this type of embarrassment anymore.
You have two ways to proceed: Either let these emails lie in their folder as one big archive or sort them by date and archive all messages that arrived before a specific point in time.
For example, you could opt to archive all emails received before July 2022. Now, your mission, if you choose to accept it, is to tackle the remaining emails using your shiny new ‘4Ds ‘ strategy! It’s as easy as pie: delete what you definitely don’t need and either store or action the rest.
Here’s a tip: Set aside regular time intervals exclusively to deal with your backlog, in addition to your usual email processing routine. Add in a 5-minute slot here and there—you’ll be amazed at how quickly the email mountain starts to shrink! It might take a week, a month, or even longer, depending on the size of your backlog. But once you’ve conquered it, you’ll have everything done and dusted and definitely will deserve a celebration.
The last thing you need to know about Email Management System
To sum up, here are your 7 steps to email mastery:
With these steps, you’ll have an email management system that not only works efficiently but also makes dealing with emails less of a chore and more of a productive routine.
You might also notice, that you have more time to focus on other important things in your life, have less stress about missing important emails and events, and generally feel so much more in control! You might also have some positive side effects on your well-being in general if you follow my advice and avoid checking email in between and turn off email notifications!
I hope this article has helped you understand how to take your inbox under control. If I missed anything, please shoot me an email and let me know! I’m happy to help with any questions you have!
Do you want a handy guide to
implement all of it?
